


Chapter Two - Completing and posing the miniature
Welcome back to The Making of the Beast!
I'll now document the work I've done to take the basic T-Pose to a finished sculpt, ready for 3D printing.
Normally after taking a break from a sculpt, I'll come back to it with fresh ideas, and also make improvements and changes, and the Werewolf is no exception!
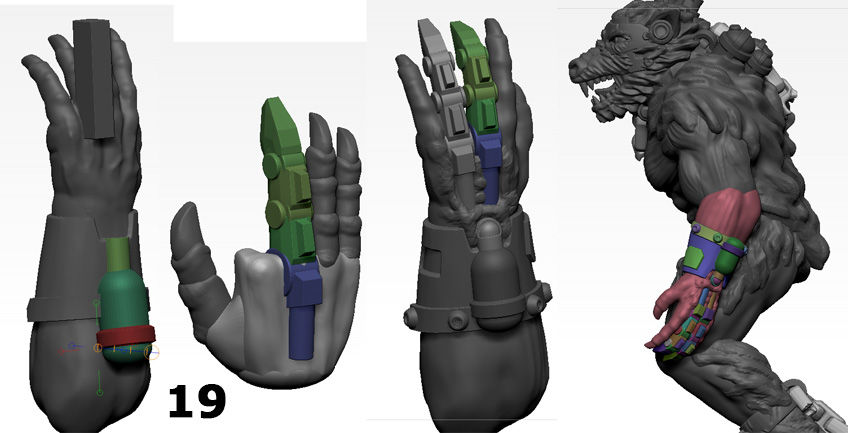
19. The Werewolf has to have a separate right arm in order to be cast in resin, so like the head, I'm taking the chance to make an alternative piece with some more sci-fi elements.
In the image above you can see some stages in the creation of a partially bionic forearm, ending with it attached to the T-Pose.
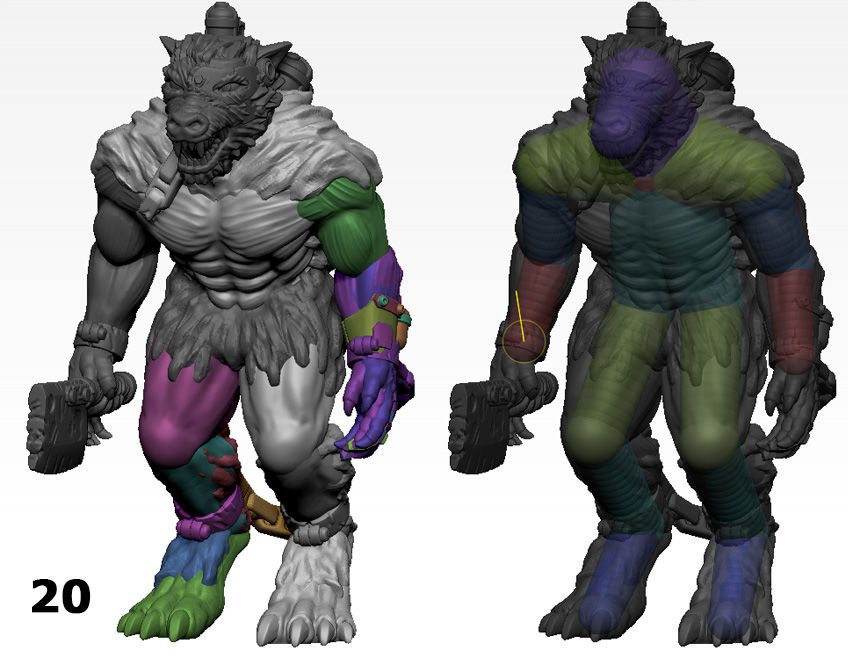
20. Here you can see the final T-Pose ready for posing into the final sculpt. On the right you can see the Zsphere skeleton, which can be moved around while maintaining the correct proportions, this is what ensures that all the various body parts remain in proportion, regardless of the pose.
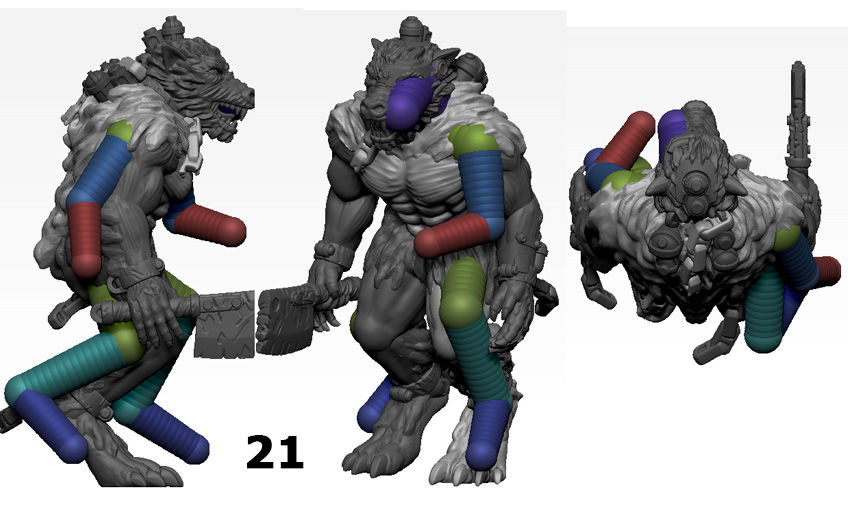
21. The model remains unchanged for now, but the Zsphere skeleton has been positioned in the pose I want for the final model. The legs are now spread apart in a more natural way (viewing from above helps check the centre of balance), the right arm will be back slightly, and the left arm bent under the torso.

22. Here you can see the leg part way through posing. Each separate section (different colours) can be manipulated separately, using the Zsphere skeleton as a guide. I start by rotating the whole leg at the hip, then lock the thigh and rotate the lower limbs at the knee. This continues until finally the toes are flattened to the ground.
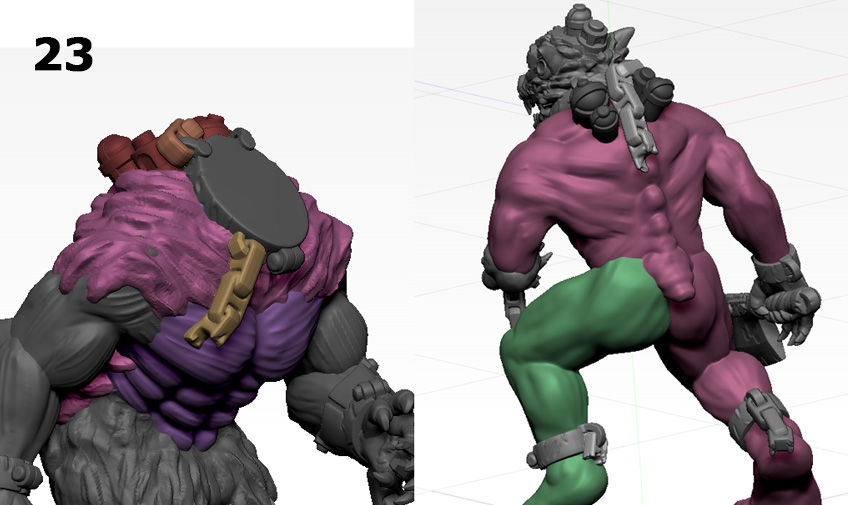
23. The separate parts of the body have been joined together into larger parts. This means the pose can't easily be changed, but I can sculpt in more realistic musculature. On the left I've hidden the head parts, allowing me to work more easily on the positioning of the neck collar - a great pose can look weird if the small details are overlooked.
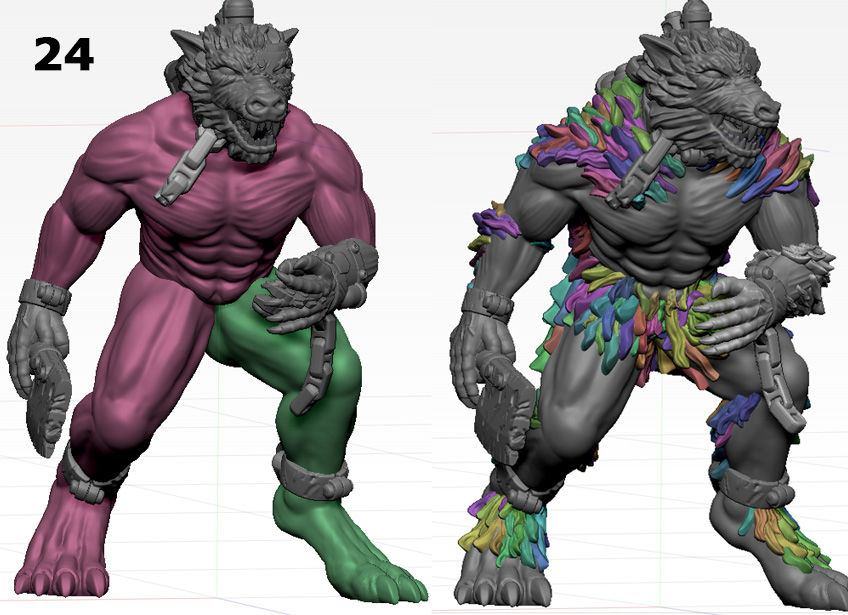
24. Our Werewolf is a bit naked. I made a custom brush which allows me to add individual strands of fur, this is a quick way to get a nice realistic texture. I wanted to leave large areas of skin exposed to allow for interesting paint schemes - the entire model can be one similar colour, or the skin and fur can be contrasting colours.
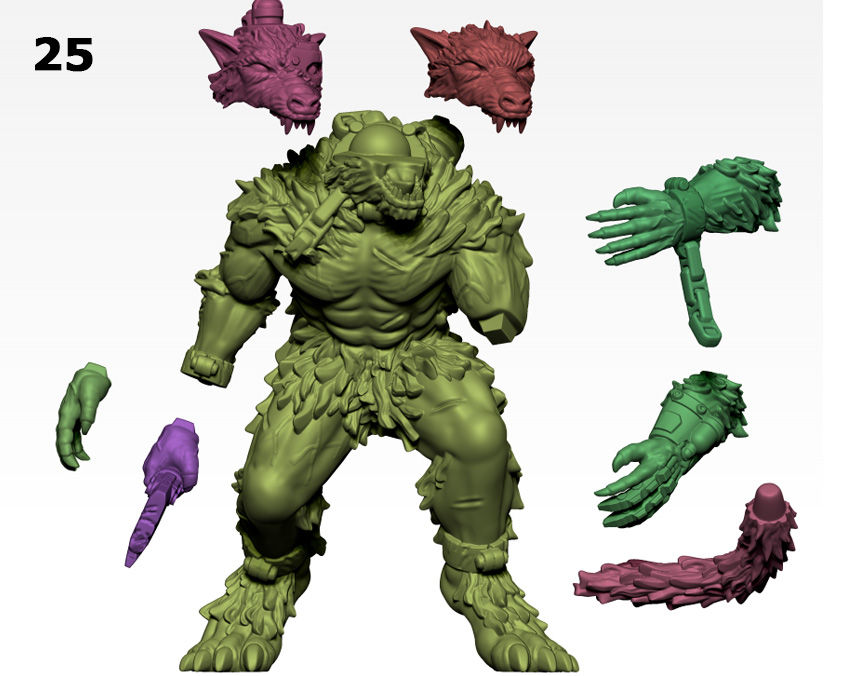
25. Here are all the final components which will make up the Beast! Where parts are separate, I've added "keys", which allow the parts to fit together perfectly with minimal gaps - for example the tail has a peg which slots in at the base of the spine.
The choice of 2 left hands, 2 right forearms and 2 heads mean the model can be assembled differently depending on the intended use, and conversions are also made easier!
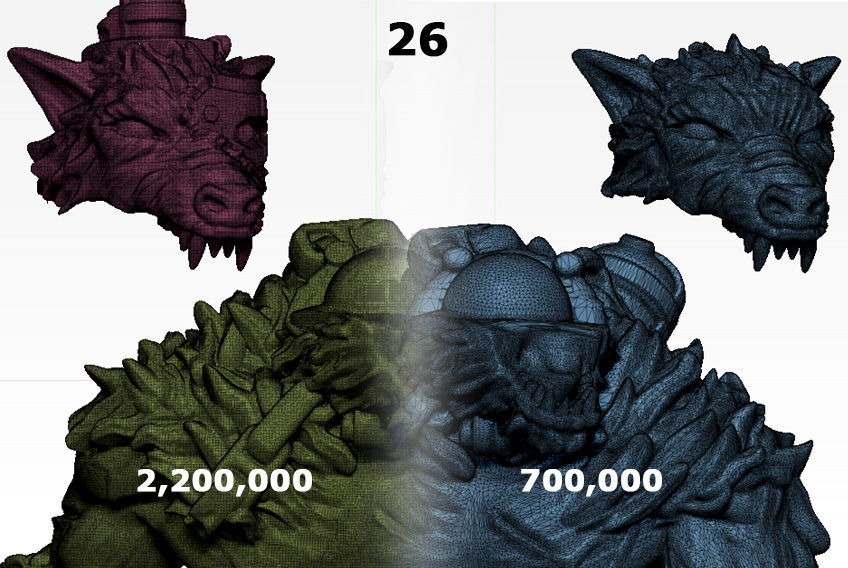
26. The final model is 2.2 million polygons (the individual flat planes which make up a 3D model) which is much too much data for our 3D printer to handle! I use a process called Mesh Decimation to reduce the number of Polygons from 2.2 million to 700 thousand, without reducing the visible detail of the sculpt.
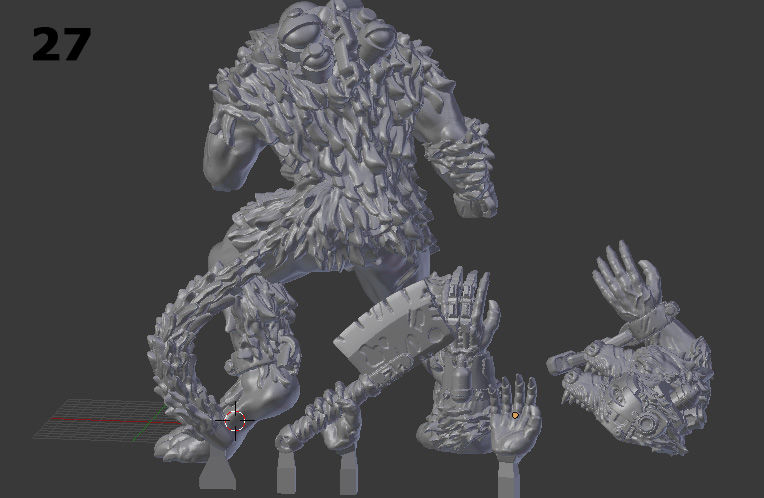
27. Our final parts are exported as a .obj file (still 70mb even after Decimation) into Blender, which I use for arranging the parts neatly to fit on our 3D printer bed, which is 55mm x 32mm.
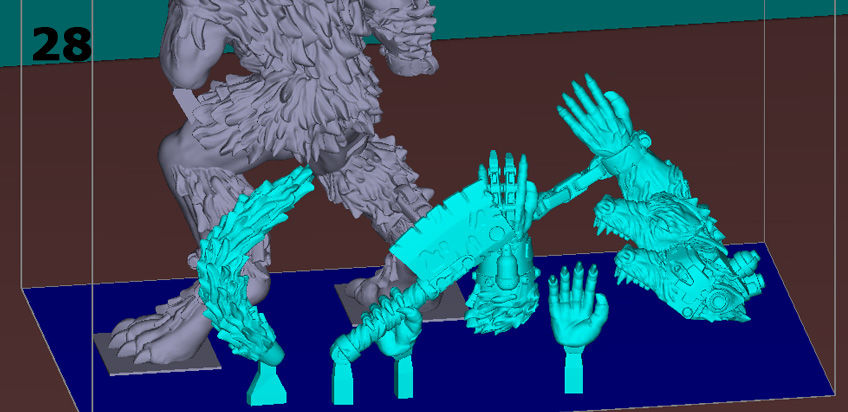
28. The model is imported into our 3D printer software to be sliced.
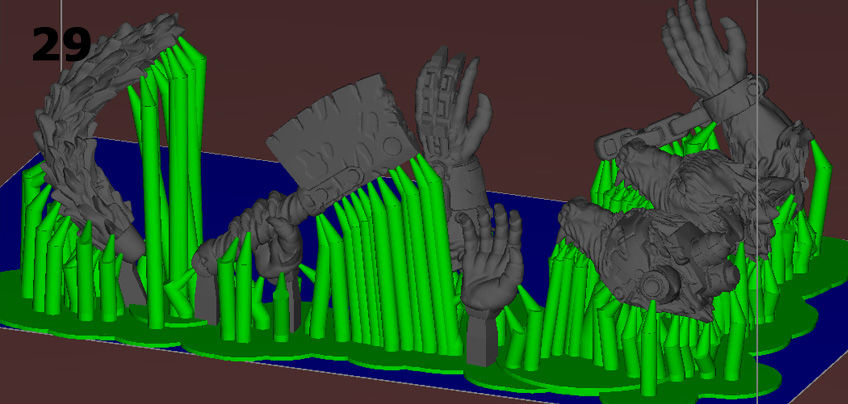
29. Parts cannot have any "undercut" or they will not attach properly to the build platform. This means on a complicated model with lots of undercuts, we need to manually add support material, which will be removed later.
Coming up next:
The Making of the Beast Chapter Three
3D printing, and resin production!